Thermal Repasting: When and How to Replace CPU Thermal Paste
Is your computer sounding like a jet engine taking off just to browse the internet? Are your games stuttering even though your hardware should be crushing them? The culprit might be something as simple as dried-up thermal paste. Don't worry, you're not alone, and thankfully, there's a fix!
Many computer users often experience frustrations with their computer's performance, from unexplained slowdowns to sudden shutdowns. They might find themselves constantly monitoring CPU temperatures, tweaking fan curves, or even researching expensive cooling solutions, all because their processor isn't being adequately cooled. It's a common issue that can leave you feeling helpless and your wallet a little lighter.
This article aims to guide you through the process of thermal repasting, explaining when and how to replace the thermal paste on your CPU. We'll cover everything from identifying the symptoms of dried-up thermal paste to the step-by-step process of applying fresh paste, ensuring your computer runs cooler and performs at its best.
We've explored why thermal paste is important, how to identify when it needs replacing, and the best methods for application. By understanding these key concepts, you can keep your CPU running cool and your computer performing optimally. This includes topics such as CPU temperature, thermal conductivity, cooling solutions, and preventative maintenance.
Why Thermal Paste Matters
I remember the first time I built my own computer. I was so excited to finally play all the latest games without lag. After painstakingly putting everything together, I fired it up, only to be greeted with incredibly loud fan noise and a CPU temperature that quickly climbed into dangerous territory. Panic set in! After some frantic Googling, I realized I had completely forgotten to apply thermal paste between the CPU and the cooler. Rookie mistake! The thermal paste is like a bridge filling in the microscopic imperfections between your CPU's heat spreader and the cooler's base. These imperfections create air gaps, and air is a terrible conductor of heat. Without thermal paste, the heat from your CPU can't efficiently transfer to the cooler, leading to overheating and performance issues.
Thermal paste, sometimes referred to as thermal grease, thermal compound, or heat sink paste, is a thermally conductive substance applied between heat sinks and heat sources such as integrated circuits. Its main purpose is to eliminate air gaps between the heat source and sink, maximizing heat transfer by filling in microscopic irregularities that would otherwise trap air. Air is a poor thermal conductor, and the presence of even tiny air gaps can significantly reduce the effectiveness of a heat sink. Thermal paste ensures efficient heat dissipation, preventing components from overheating and improving overall system stability and performance. Different types of thermal paste exist, including ceramic-based, metal-based, and liquid metal compounds, each offering varying levels of thermal conductivity and price points. Choosing the right thermal paste is crucial for optimal cooling performance.
Is it Time to Repaste? Identifying the Signs
The tale of thermal paste dates back to the early days of electronics when engineers realized the need for efficient heat transfer. In the beginning, simple solutions like applying petroleum jelly were used. As technology advanced, so did the formulations of thermal compounds. Early thermal pastes were often made with zinc oxide, offering a moderate improvement in heat transfer compared to air. Myths surrounding thermal paste are abundant. One common misconception is that applying more thermal paste is better. In reality, excess paste can act as an insulator, hindering heat transfer. Another myth is that all thermal pastes are created equal. The thermal conductivity of different pastes varies significantly, and choosing a high-quality paste can make a noticeable difference in CPU temperatures. Even the application method is subject to myths, with some believing that spreading the paste manually is superior to letting the cooler's pressure distribute it. The truth is that the optimal application method depends on the CPU and cooler design, and careful attention to instructions is key.
The Hidden Secrets of Application Techniques
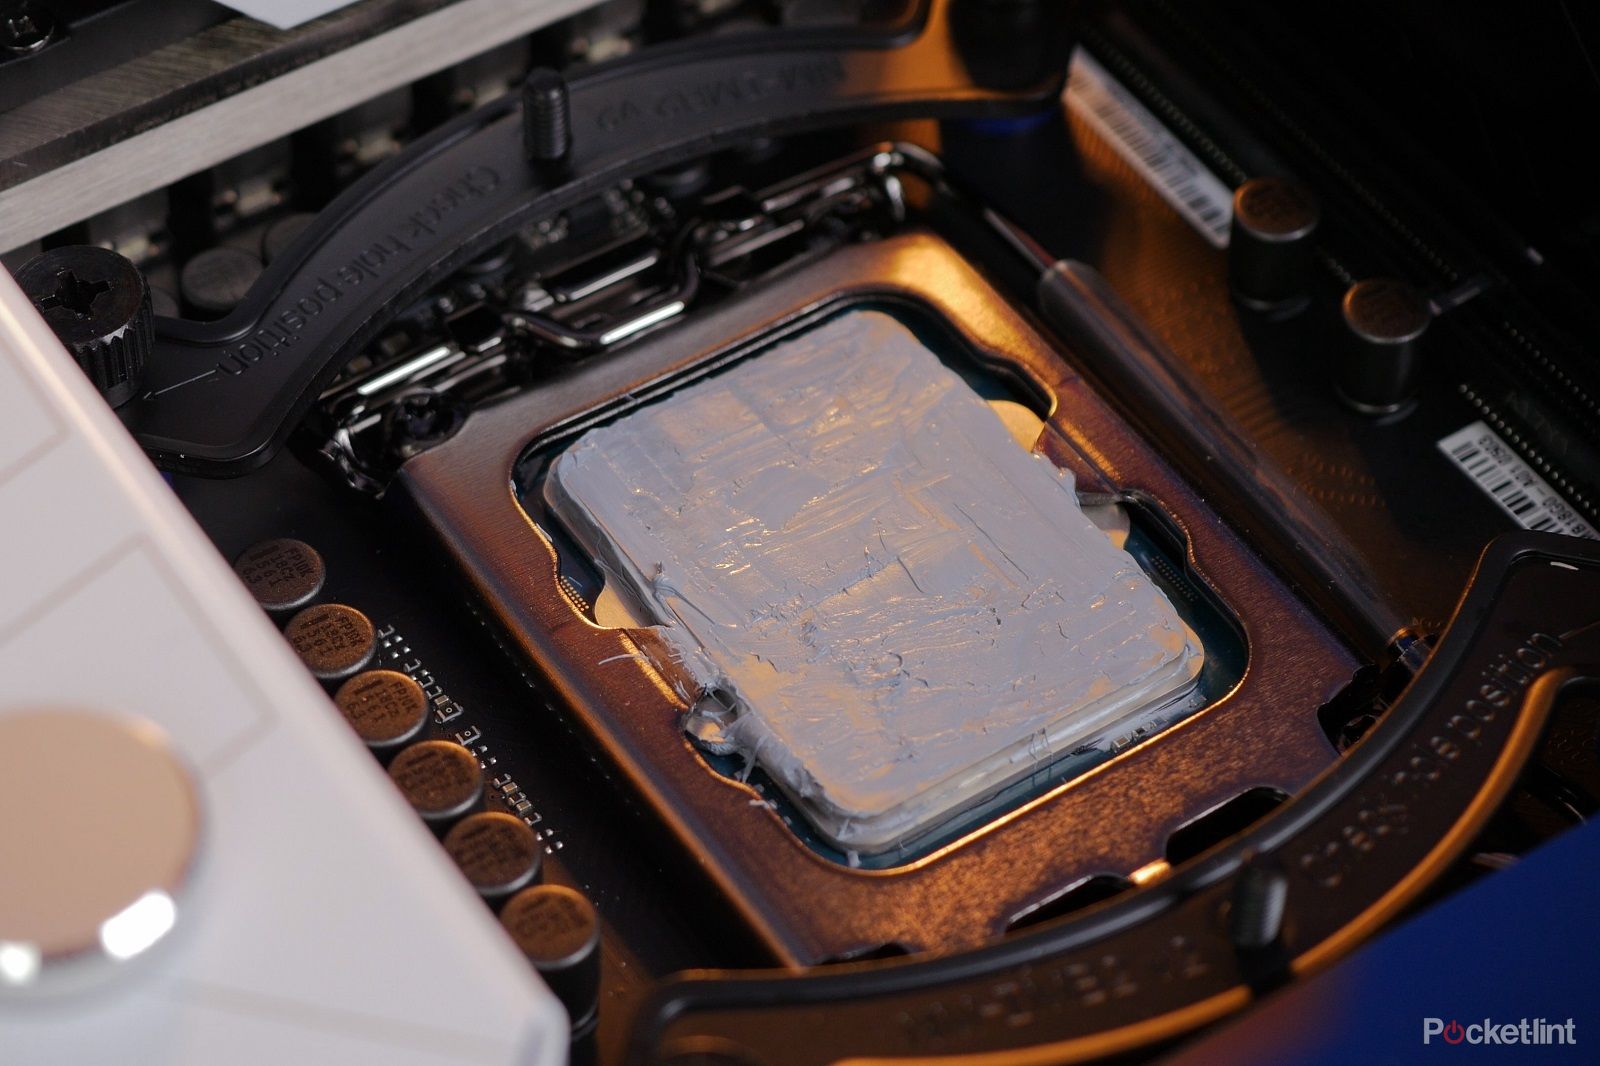
The secret to effective thermal repasting lies not just in the product you choose, but also in how you apply it. Many overlook the importance of proper surface preparation. Before applying new thermal paste, it's crucial to thoroughly clean both the CPU heat spreader and the cooler's base with isopropyl alcohol (90% or higher) to remove any residue from the old paste. Failing to do so can compromise the thermal conductivity of the new application. Different application methods exist, each with its own advantages and disadvantages. The "pea" method, where a small dot of paste is placed in the center of the CPU, is widely recommended as it allows the cooler's pressure to spread the paste evenly. However, for larger CPUs or coolers with specific designs, the "X" method or the "line" method might be more effective. Ultimately, the goal is to achieve full and even coverage without excess paste spilling over the edges. Applying too much thermal paste is a common mistake that can lead to reduced performance, while applying too little can result in inadequate cooling and overheating.
Choosing the Right Thermal Paste: Recommendations
Choosing the right thermal paste can feel overwhelming, given the multitude of options available on the market. When selecting thermal paste, consider factors such as thermal conductivity, viscosity, ease of application, and longevity. Generally, pastes with higher thermal conductivity ratings (measured in W/m K) offer better cooling performance, but they often come at a higher price. For most users, a mid-range thermal paste from a reputable brand like Arctic, Noctua, or Thermal Grizzly will provide excellent results. Avoid generic, no-name pastes, as their performance is often subpar. Consider the application method as well. Some pastes are thicker and require more effort to spread, while others are thinner and easier to apply. If you're a beginner, opt for a paste that is known for its ease of application. Pay attention to reviews and benchmarks from reputable sources to get an idea of the performance and longevity of different thermal pastes. Remember, the best thermal paste for your needs will depend on your specific CPU, cooler, and budget.
Step-by-Step Guide to Thermal Repasting
Before you start, gather your supplies: a tube of new thermal paste, isopropyl alcohol (90% or higher), lint-free cloths or coffee filters, and a small spatula or applicator (optional). First, power down your computer and disconnect the power cord. Carefully remove the CPU cooler, noting how it's attached. Gently twist the cooler to break the seal with the old thermal paste. Clean the CPU heat spreader and the cooler's base with isopropyl alcohol and a lint-free cloth, removing all traces of the old paste. Apply a small amount of new thermal paste to the center of the CPU using your preferred method (pea, X, or line). Reinstall the CPU cooler, ensuring it's properly seated and tightened. Avoid over-tightening, as this can damage the CPU or motherboard. Power on your computer and monitor CPU temperatures to ensure the repasting was successful. If temperatures are still high, double-check the cooler installation and consider reapplying the thermal paste.
Tips for a Successful Repasting
Achieving optimal results when repasting your CPU requires attention to detail and careful execution. One of the most important tips is to avoid touching the thermal paste with your fingers. The oils and contaminants on your skin can degrade the performance of the paste. Always use a spatula, applicator, or wear gloves when handling thermal paste. When cleaning the CPU and cooler, be patient and thorough. Stubborn residue from old thermal paste can be difficult to remove, so use plenty of isopropyl alcohol and gently scrub until the surfaces are completely clean. If you're using a liquid metal thermal compound, take extra precautions to prevent it from coming into contact with other components, as it can be conductive and cause short circuits. Apply liquid metal only to CPUs and coolers specifically designed for it. Consider investing in a high-quality thermal paste applicator for more precise and even application. These applicators typically come with stencils or templates to help you apply the perfect amount of paste every time.
Troubleshooting Common Issues
Even with careful preparation, you might encounter issues during or after the thermal repasting process. One common problem is difficulty removing the old thermal paste. If the paste is particularly stubborn, try gently heating the CPU and cooler with a hairdryer or heat gun on a low setting. This can soften the paste and make it easier to remove. Another issue is accidentally bending CPU pins when removing or reinstalling the cooler. Be extremely careful when handling the CPU to avoid damaging the pins. If you do bend a pin, use a magnifying glass and a fine-tipped tool to gently straighten it. If your CPU temperatures are still high after repasting, check the cooler installation to ensure it's properly seated and making good contact with the CPU. If the cooler is loose or not making full contact, tighten it or try reapplying the thermal paste. Consider reseating your RAM or graphics card, sometimes these components can cause temperature issues. Also remember to update your BIOS to ensure that you have the newest drivers installed.
Fun Facts About Thermal Paste
Did you know that the world's most expensive thermal paste can cost hundreds of dollars per gram? These exotic compounds often contain rare materials like diamond dust or silver nanoparticles to achieve unparalleled thermal conductivity. While the average user won't need such extreme performance, it's fascinating to see the lengths manufacturers go to push the boundaries of cooling technology. The amount of thermal paste used in the entire world each year is estimated to be several tons. From computers and gaming consoles to smartphones and industrial equipment, thermal paste plays a critical role in keeping electronics cool and reliable. Some thermal pastes are electrically conductive, while others are not. It's crucial to choose a non-conductive paste for most applications to avoid short circuits. Liquid metal thermal compounds are an exception, as they are inherently conductive and require careful handling. Thermal paste doesn't last forever. Over time, it can dry out and lose its effectiveness, leading to increased CPU temperatures. This is why regular repasting is necessary to maintain optimal cooling performance.
How to Apply Thermal Paste: A Visual Guide
While the "pea" method is often recommended, it's important to understand that different application methods may be more suitable depending on the CPU and cooler design. For CPUs with a large surface area, such as those found in high-end desktops or servers, the "X" method or the "line" method can provide better coverage. The "X" method involves applying a thin line of thermal paste diagonally across the CPU, forming an "X" shape. The "line" method involves applying a thin line of thermal paste down the center of the CPU. In both cases, the goal is to ensure that the paste spreads evenly across the entire surface when the cooler is installed. Some users prefer to manually spread the thermal paste with a spatula or applicator to achieve a thin, even layer. This method can be effective, but it requires practice and care to avoid applying too much or too little paste. Always refer to the manufacturer's instructions for your specific CPU and cooler to determine the best application method. There are lots of video on you tube. A visual guide can provide valuable insights into different application techniques and help you avoid common mistakes.
What If I Don't Repaste? Potential Consequences
Ignoring the need for thermal repasting can lead to a cascade of problems that ultimately impact your computer's performance and longevity. As thermal paste dries out, its thermal conductivity decreases, causing CPU temperatures to rise. High CPU temperatures can trigger thermal throttling, where the CPU automatically reduces its clock speed to prevent overheating. This results in noticeable performance slowdowns, especially during demanding tasks like gaming or video editing. Prolonged exposure to high temperatures can also damage the CPU and other components, shortening their lifespan. In extreme cases, overheating can cause the computer to shut down unexpectedly or even result in permanent hardware failure. If your computer is experiencing unexplained slowdowns, loud fan noise, or frequent crashes, it's essential to check your CPU temperatures and consider thermal repasting. Regular repasting is a simple and cost-effective way to prevent these problems and keep your computer running smoothly. Also bear in mind it will cost less to maintain than to replace parts and components.
Top 5 Reasons to Repaste Your CPU
- Improve Cooling Performance: Fresh thermal paste ensures efficient heat transfer, lowering CPU temperatures.
- Prevent Thermal Throttling: Lower temperatures prevent the CPU from reducing its clock speed, maintaining optimal performance.
- Extend Hardware Lifespan: Keeping components cool reduces the risk of damage and prolongs their lifespan.
- Reduce Fan Noise: Lower temperatures mean the CPU fan doesn't have to work as hard, resulting in quieter operation.
- Maintain System Stability: Preventing overheating reduces the risk of crashes and unexpected shutdowns.
Question and Answer
Q: How often should I replace my CPU thermal paste?
A: Generally, it's recommended to replace thermal paste every 1-2 years, or sooner if you notice high CPU temperatures.
Q: Can I use any type of thermal paste?
A: While you can use most types of thermal paste, it's best to choose a reputable brand with good thermal conductivity ratings.
Q: How much thermal paste should I apply?
A: A small amount, about the size of a grain of rice or a pea, is usually sufficient. Avoid applying too much or too little.
Q: Is it safe to touch thermal paste with my fingers?
A: No, it's best to avoid touching thermal paste with your fingers, as the oils and contaminants on your skin can degrade its performance.
Conclusion of Thermal Repasting: When and How to Replace CPU Thermal Paste
Maintaining optimal CPU temperatures is crucial for ensuring your computer runs smoothly and reliably. By understanding when and how to replace your CPU thermal paste, you can prevent performance issues, extend the lifespan of your hardware, and enjoy a quieter computing experience. Whether you're a seasoned PC builder or a first-time repaster, the knowledge and techniques shared in this guide will empower you to take control of your computer's cooling and unleash its full potential. So, grab your thermal paste, follow the steps, and get ready to experience the benefits of a cooler, more efficient system.
Post a Comment