Micro ATX Gaming Build: Compact Powerhouse PC Building Guide
Want a gaming PC that doesn't hog your desk space but still packs a serious punch? You've come to the right place! We're diving into the world of Micro ATX gaming builds – compact powerhouses that deliver impressive performance without the bulk of a full-sized tower.
Many gamers face a dilemma: they crave high-end performance but don't necessarily have the room for a sprawling ATX build. Finding components that fit the Micro ATX form factor while still providing the power needed for demanding games can also be challenging. Balancing cost, performance, and size requires careful planning and consideration.
This guide is designed for anyone looking to build a powerful gaming PC in a smaller, more space-efficient form factor. Whether you're a seasoned PC builder or a complete beginner, we'll walk you through the process of selecting the right components, assembling your system, and optimizing it for gaming.
In this guide, we'll explore the benefits of Micro ATX gaming builds, discuss component selection, provide step-by-step assembly instructions, and offer tips for maximizing performance. From choosing the right motherboard and CPU to selecting a graphics card that fits your needs, we'll cover everything you need to know to create a compact gaming powerhouse. Get ready to unleash the potential of Micro ATX!
Why Choose Micro ATX for Gaming?
I remember when I first built a Micro ATX system. I was living in a small apartment and desperately wanted a gaming PC, but space was a major constraint. The idea of a full-tower case was simply out of the question. After some research, I stumbled upon the Micro ATX form factor and was immediately intrigued. The promise of a smaller, more manageable PC that could still deliver decent gaming performance was incredibly appealing. It was my first time putting together a PC, and the smaller form factor made it less intimidating. Plus, the finished product looked great on my limited desk space.
Micro ATX offers a sweet spot between compact size and expansion capabilities. Unlike Mini-ITX, which is even smaller but more restrictive in terms of upgrades, Micro ATX provides more slots for RAM, expansion cards, and storage devices. This makes it a great choice for gamers who want a smaller PC now but might want to upgrade components down the line. A Micro ATX build is also generally more affordable than a comparable ATX build, as Micro ATX motherboards and cases tend to be less expensive. For those on a budget, this can be a significant advantage. In conclusion, Micro ATX is a fantastic option for gamers seeking a balance of performance, size, and cost-effectiveness.
What is a Micro ATX Gaming Build?
A Micro ATX gaming build refers to a gaming PC constructed using components that adhere to the Micro ATX form factor. This primarily involves a Micro ATX motherboard, which is smaller than a standard ATX motherboard, typically measuring 9.6 x
9.6 inches. Consequently, the PC case used must also be compatible with the Micro ATX form factor, generally resulting in a more compact overall system. However, despite its smaller size, a Micro ATX gaming build is still capable of delivering impressive gaming performance, thanks to advancements in component miniaturization and power efficiency.
At its core, a Micro ATX gaming build aims to provide a balance between performance and size. It caters to gamers who want a powerful PC but don't have the space for a full-sized ATX tower or simply prefer a more discreet and portable system. By carefully selecting components such as a high-performance CPU, a dedicated graphics card, sufficient RAM, and fast storage, a Micro ATX build can easily handle modern games at high settings. Moreover, Micro ATX systems often benefit from better airflow and cooling compared to even smaller Mini-ITX builds, contributing to more stable performance during extended gaming sessions. As the demand for smaller and more efficient PCs continues to grow, Micro ATX gaming builds are becoming increasingly popular among gamers seeking a compact yet powerful solution.
The History and Myths of Micro ATX Gaming Builds
The Micro ATX form factor was introduced by Intel in 1997 as a smaller and more cost-effective alternative to the ATX standard. Initially, it was primarily targeted at budget-friendly desktop PCs and wasn't considered a serious option for gaming. The perception was that Micro ATX systems were inherently less powerful and more limited in terms of expandability compared to their larger ATX counterparts. This belief stemmed from the fact that early Micro ATX motherboards often had fewer expansion slots and less robust power delivery systems.
One of the biggest myths surrounding Micro ATX gaming builds is that they are significantly less powerful than ATX builds. While it's true that some Micro ATX motherboards may have fewer features or slightly less overclocking potential, the core components – CPU, GPU, RAM – can be just as powerful as those used in an ATX system. Modern Micro ATX motherboards are capable of supporting high-end processors and graphics cards, allowing for excellent gaming performance. The key is to choose the right components and ensure that the system has adequate cooling. Over time, the perception of Micro ATX has shifted dramatically as technology has advanced and smaller components have become more powerful. Today, a well-built Micro ATX gaming PC can easily rival the performance of a larger ATX system, debunking the myth that smaller necessarily means weaker.
Hidden Secrets of Micro ATX Gaming Builds
One of the lesser-known advantages of Micro ATX gaming builds is their potential for enhanced portability. While not as compact as Mini-ITX systems, Micro ATX PCs are still significantly smaller and lighter than full-sized ATX towers. This makes them easier to transport to LAN parties, gaming events, or even just moving them around the house. Another often overlooked aspect is the potential for better cable management in a Micro ATX case. Due to the smaller size, cables are often shorter and easier to route, resulting in a cleaner and more organized interior. This not only improves airflow but also makes it easier to access components for upgrades or maintenance.
Another hidden secret lies in the potential for better acoustics. Smaller cases tend to be more prone to noise due to limited space for airflow and vibration dampening. However, with careful component selection and proper cooling solutions, a Micro ATX gaming build can be surprisingly quiet. Choosing a quiet CPU cooler, a graphics card with a well-designed cooler, and a case with good sound dampening can significantly reduce noise levels. Furthermore, optimizing fan curves and using solid-state drives (SSDs) instead of mechanical hard drives can further minimize noise. With a bit of planning and attention to detail, a Micro ATX gaming build can be both powerful and surprisingly silent, offering a more immersive gaming experience.
Recommendations for Micro ATX Gaming Builds
When it comes to recommending components for a Micro ATX gaming build, it's essential to consider both performance and compatibility. For the CPU, a mid-range to high-end processor from Intel or AMD is a great choice, depending on your budget and gaming requirements. A popular option is the AMD Ryzen 5 5600X or the Intel Core i5-12600K, both of which offer excellent performance for gaming and other tasks. For the graphics card, aim for a model that balances power and size. The NVIDIA Ge Force RTX 3060 or AMD Radeon RX 6600 XT are excellent choices for 1080p or 1440p gaming.
When selecting a Micro ATX motherboard, make sure it's compatible with your chosen CPU and has enough expansion slots for your needs. Look for features like PCIe 4.0 support, multiple M.2 slots for NVMe SSDs, and good VRM cooling for overclocking. For RAM, 16GB is generally sufficient for most games, but 32GB is recommended for future-proofing and demanding titles. Choose a kit with a speed of at least 3200MHz for optimal performance. For storage, an NVMe SSD is a must for fast boot times and game loading speeds. A 500GB or 1TB SSD is a good starting point, with the option to add a larger hard drive for additional storage. Finally, choose a power supply unit (PSU) with enough wattage to handle all your components, plus some headroom for future upgrades. A 650W or 750W PSU with 80+ Gold certification is a solid choice. With these recommendations in mind, you can build a powerful and efficient Micro ATX gaming PC that fits your needs and budget.
Essential Components for a Micro ATX Gaming Build
The foundation of any Micro ATX gaming build is, of course, the components. You'll need a Micro ATX motherboard, which is the central hub connecting all your other components. Make sure it's compatible with your chosen CPU (Intel or AMD) and has the features you need, such as sufficient RAM slots, PCIe slots for your graphics card, and M.2 slots for fast NVMe SSDs.
Next is the CPU, the brains of your system. For gaming, a mid-range to high-end processor is recommended. AMD Ryzen 5 or Intel Core i5 processors offer a great balance of performance and price. Don't forget a CPU cooler to keep your processor running at optimal temperatures, especially if you plan to overclock. The graphics card is arguably the most important component for gaming. Choose a model that can handle the games you want to play at your desired resolution and settings. NVIDIA Ge Force RTX or AMD Radeon RX cards are popular choices. RAM, or Random Access Memory, is essential for multitasking and running games smoothly. 16GB is generally sufficient for most modern games, but 32GB is recommended for more demanding titles or if you plan to stream or create content. Storage is where you'll store your operating system, games, and other files. A fast NVMe SSD is highly recommended for quick boot times and game loading speeds. A traditional hard drive can be added for additional storage if needed. Finally, the power supply unit (PSU) provides power to all your components. Choose a PSU with enough wattage to handle all your components, plus some headroom for future upgrades. A good quality PSU is essential for system stability and longevity. A PC case, specifically one that supports the Micro ATX form factor, is what houses all your components. Choose a case that has good airflow, cable management features, and fits your aesthetic preferences. With these essential components in mind, you're well on your way to building a powerful Micro ATX gaming rig.
Tips for Optimizing Your Micro ATX Gaming Build
Optimizing your Micro ATX gaming build involves more than just selecting the right components; it also requires careful attention to detail during assembly and configuration. Cable management is crucial in a Micro ATX case, as space is limited. Route cables neatly and use zip ties or Velcro straps to keep them organized. This not only improves airflow but also makes it easier to access components for upgrades or maintenance.
Cooling is another critical aspect of optimizing a Micro ATX gaming build. Due to the smaller size, airflow can be restricted, leading to higher temperatures. Invest in a good CPU cooler and ensure that your case has adequate fans to exhaust hot air. Consider using aftermarket fans with higher airflow and lower noise levels. Overclocking can significantly boost your gaming performance, but it also generates more heat. Monitor your CPU and GPU temperatures closely and adjust your overclock settings accordingly. Use software like MSI Afterburner or AMD Ryzen Master to monitor temperatures and tweak clock speeds. Software optimization is often overlooked, but it can have a significant impact on gaming performance. Make sure your drivers are up to date, especially your graphics card drivers. Adjust your in-game settings to find the optimal balance between visual quality and frame rate. Finally, regularly clean your PC to prevent dust buildup, which can impede airflow and increase temperatures. Use a can of compressed air to clean fans, heatsinks, and other components. By following these tips, you can ensure that your Micro ATX gaming build runs smoothly, efficiently, and reliably.
Troubleshooting Common Micro ATX Build Issues
Even with careful planning, you might encounter issues during the assembly or operation of your Micro ATX gaming build. One common problem is compatibility issues between components. Before purchasing any parts, double-check that they are compatible with each other, especially the CPU and motherboard. Consult the motherboard's manual or the manufacturer's website to verify compatibility.
Another common issue is overheating. This can be caused by inadequate cooling, poor airflow, or excessive overclocking. Make sure your CPU cooler is properly installed and that your case has enough fans to exhaust hot air. Clean your PC regularly to prevent dust buildup, which can impede airflow. If you're overclocking, reduce your clock speeds or increase your cooling capacity. Driver issues can also cause problems, such as crashes, stuttering, or graphical glitches. Make sure your graphics card drivers are up to date and compatible with your operating system. You can download the latest drivers from the NVIDIA or AMD websites. Power supply issues can manifest in various ways, such as random shutdowns, system instability, or component failures. Make sure your PSU has enough wattage to handle all your components, plus some headroom for future upgrades. A good quality PSU is essential for system stability and longevity. If you encounter any issues, consult online forums, communities, or the manufacturer's website for troubleshooting tips. With a bit of patience and perseverance, you can overcome most common Micro ATX build issues and enjoy a smooth and reliable gaming experience.
Fun Facts About Micro ATX Gaming Builds
Did you know that the Micro ATX form factor was originally designed to be backward compatible with the ATX standard? This means that some older ATX cases can actually accommodate a Micro ATX motherboard, although it might look a bit small inside. Another interesting fact is that Micro ATX motherboards are often used in industrial PCs and embedded systems due to their compact size and reliability.
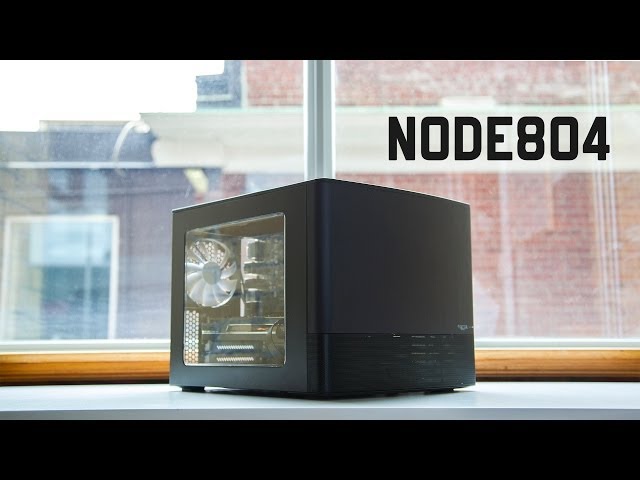
Micro ATX gaming builds have become increasingly popular in recent years, thanks to the rise of e Sports and LAN parties. The smaller size of Micro ATX PCs makes them easier to transport to gaming events. Micro ATX cases come in a wide variety of styles and designs, from minimalist cubes to aggressive, gamer-inspired enclosures. This allows you to build a PC that not only performs well but also looks great. The smallest Micro ATX cases can be surprisingly compact, some even smaller than a shoebox. This makes them ideal for gamers who have limited desk space or want a PC that's easy to travel with. Some Micro ATX motherboards even support dual graphics cards, allowing you to build a truly high-end gaming rig in a compact form factor. With the advancements in component miniaturization and power efficiency, Micro ATX gaming builds are becoming more and more powerful, challenging the traditional notion that bigger is always better.
How to Assemble a Micro ATX Gaming Build
Assembling a Micro ATX gaming build is similar to building a full-sized ATX system, but with some minor differences due to the smaller size. First, gather all your components and tools, including a Phillips head screwdriver, anti-static wrist strap, and cable ties. Start by installing the CPU on the motherboard, being careful to align the pins correctly. Apply thermal paste to the CPU and install the CPU cooler.
Next, install the RAM modules into the appropriate slots on the motherboard. Make sure they are properly seated and that the clips are locked in place. Install the motherboard into the case, aligning the standoffs with the holes in the motherboard. Screw in the standoffs to secure the motherboard to the case. Install the graphics card into the PCIe slot on the motherboard. Make sure it's fully seated and that the latch is secured. Install the storage devices (SSD and/or hard drive) into the appropriate bays in the case. Connect the SATA data and power cables to the storage devices and the motherboard. Install the power supply unit (PSU) into the case and connect the power cables to the motherboard, graphics card, and storage devices. Route the cables neatly and use zip ties or Velcro straps to keep them organized. Finally, connect the front panel connectors (power button, reset button, USB ports, audio jacks) to the motherboard. Double-check all your connections and make sure everything is properly seated. Plug in the power cord and turn on the PC. If everything is installed correctly, the PC should boot up. Install the operating system and drivers, and you're ready to start gaming! With a little patience and attention to detail, you can successfully assemble your own Micro ATX gaming build.
What If My Micro ATX Gaming Build Doesn't Work?
Encountering issues after assembling your Micro ATX gaming build can be frustrating, but don't panic! The first step is to systematically troubleshoot the problem. Start by checking all your connections to ensure that everything is properly seated and connected. A loose cable or improperly installed component can prevent the system from booting.
If the PC doesn't power on at all, check the power supply unit (PSU). Make sure the power switch on the back of the PSU is turned on and that the power cord is properly connected. Test the PSU with a PSU tester to ensure that it's providing power. If the PC powers on but doesn't display anything on the screen, check the graphics card. Make sure it's properly seated in the PCIe slot and that the power cables are connected. Try using a different monitor or cable to rule out a display issue. If the PC boots up but crashes or experiences instability, check the CPU and RAM. Make sure the CPU cooler is properly installed and that the CPU is not overheating. Test the RAM with a memory diagnostic tool to identify any faulty modules. If you suspect a software issue, try reinstalling the operating system or updating the drivers. Consult online forums, communities, or the manufacturer's website for troubleshooting tips. With a methodical approach and a bit of patience, you can usually identify and resolve most issues with your Micro ATX gaming build.
Listicle of Micro ATX Gaming Build
Here's a quick list to guide your Micro ATX gaming build journey:
1.Choose the Right Case: Select a Micro ATX case with good airflow and cable management.
2.Pick a Compatible Motherboard: Ensure the motherboard supports your chosen CPU and has necessary features.
3.Select a Powerful CPU: Opt for a mid-range to high-end processor for optimal gaming performance.
4.Get a Dedicated Graphics Card: Choose a GPU that can handle your desired resolution and settings.
5.Install Sufficient RAM: 16GB is a good starting point, but 32GB is recommended for future-proofing.
6.Use a Fast SSD: An NVMe SSD is essential for quick boot times and game loading speeds.
7.Choose a Reliable PSU: Select a PSU with enough wattage and 80+ Gold certification.
8.Optimize Cooling: Invest in a good CPU cooler and ensure adequate case airflow.
9.Manage Cables Neatly: Route cables carefully to improve airflow and aesthetics.
10.Update Drivers Regularly: Keep your graphics card and other drivers up to date for best performance.
Question and Answer About Micro ATX Gaming Build
Q: What are the advantages of building a Micro ATX gaming PC?
A: Micro ATX gaming PCs offer a balance of performance and size. They are smaller and more portable than full-sized ATX systems, making them ideal for gamers with limited desk space or those who want to transport their PC easily.
Q: Is a Micro ATX gaming PC less powerful than an ATX PC?
A: Not necessarily. While some Micro ATX motherboards may have fewer features or slightly less overclocking potential, the core components (CPU, GPU, RAM) can be just as powerful as those used in an ATX system.
Q: Can I upgrade a Micro ATX gaming PC in the future?
A: Yes, Micro ATX systems offer good upgradeability. You can upgrade the CPU, GPU, RAM, and storage devices as needed. However, keep in mind that the smaller size may limit your options compared to an ATX system.
Q: What should I consider when choosing components for a Micro ATX gaming build?
A: When selecting components, consider compatibility, performance, and cooling. Make sure the motherboard is compatible with your chosen CPU and has enough expansion slots. Choose a graphics card that can handle your desired resolution and settings. Invest in a good CPU cooler and ensure that your case has adequate airflow.
Conclusion of Micro ATX Gaming Build: Compact Powerhouse PC Building Guide
Building a Micro ATX gaming PC is a rewarding experience that allows you to create a powerful and compact gaming rig that fits your needs and preferences. By carefully selecting the right components, paying attention to detail during assembly, and optimizing your system for performance, you can achieve excellent gaming performance in a smaller form factor. Whether you're a seasoned PC builder or a complete beginner, this guide has provided you with the knowledge and tools you need to build your own Micro ATX gaming powerhouse. So go ahead, embrace the challenge, and unleash the potential of Micro ATX!
Post a Comment